South Indian Curry Leaves Chutney
Dive into the flavours of this super aromatic, calcium rich chutney. It is easy to make, delicious and you will love it for all the health benefits it has to offer.
Curry leaves chutney is a super aromatic, healthy and nutritious chutney. It is a staple chutney at many South Indian homes especially if you have a curry leaves plant in your backyard.
It’s a fabulous variation to South Indian Coconut Chutney. While the good old coconut chutney is great, I often swap coconut chutney with this curry leaves chutney because of the awesome benefits curry leaves have to offer. You can find the recipe of coconut chutney here; South Indian Coconut Chutney
If you have curry leaves plant at home, I insist you try out this chutney and I can bet this will be your new favourite. Even your child will love because it has a mild taste and the natural sweetness that comes from coconut.
More About Curry Leaves Chutney
Curry leaves chutney is a brilliant way of incorporating these abundant fresh leaves in your diet. The ingredients used are coconut, curry leaves and channa dal (Bengal gram).
For more flavour, I like to use ginger. Many prefer to add garlic too, however, I find this chutney better with just ginger in it. I have only used one green chili for this recipe. I don’t like this chutney to be too hot. You can add more if you like.
This recipe can also be made with choice of dried red chilies and tamarind. You can skip green chili and lemon juice and try dried red chili version. These two ingredients impart their own unique flavour. I mostly make this recipe with green chili and lemon juice.
Reasons You Should Have This Magical Herb
- Boosts Metabolism and Digestion: Curry leaves are rich in fibre and alkaloids, which aid in digestion. It helps to regulate bowel movements, reduce constipation, and improve overall digestion
- Fabulous Source of Calcium: This is one of the greatest reasons why I love curry leaves chutney. It is an ultimate source of calcium. 100 grams of curry leaves has 830mg of good quality, easy to digest calcium.
- Helps to Lower Blood Sugar: If you are suffering from diabetes, you can count on curry leaves to regulate your blood sugar levels naturally. They contain agents that slow down the breakdown of starch into glucose thereby controlling blood spikes. Infact, consuming them on an empty stomach makes it even more effective.
- Enhances Hair Health: Curry leaves are super tonic that your hair badly requires. They are a powerhouse of antioxidants, which help fight free radicals that cause damage to hair and skin.
- Anti-Bacterial: Curry leaves are highly antibacterial and can help you with your immune system. It will help improve your gut health by replenishing the good bacteria in your gut.
- Improves Eye Health: These leaves are rich in vitamin A, which is essential for maintaining good eye health. Including them in your diet can protect your eyes from damage caused by stress and improve overall eye health.
You can also include curry leaves in powdered form. I make this spiced curry leaves powder (curry patta podi) which is a flavour bomb and can be added to masala idlis, sprinkle it on dosa or uttapam to make podi dosa or you can make curry leaves podi rice with it too.

Step by Step Instructions
For detailed recipe, please jump to the recipe card below
For Grinding:
1. Wash and soak 1/2 cup channa dal or bengal gram in hot water for 1 or 2 hours. Soaking helps to break the phytic acid which is naturally present in seeds and makes it easy to digest. If short of time, you can also use store bought roasted black chickpeas too.
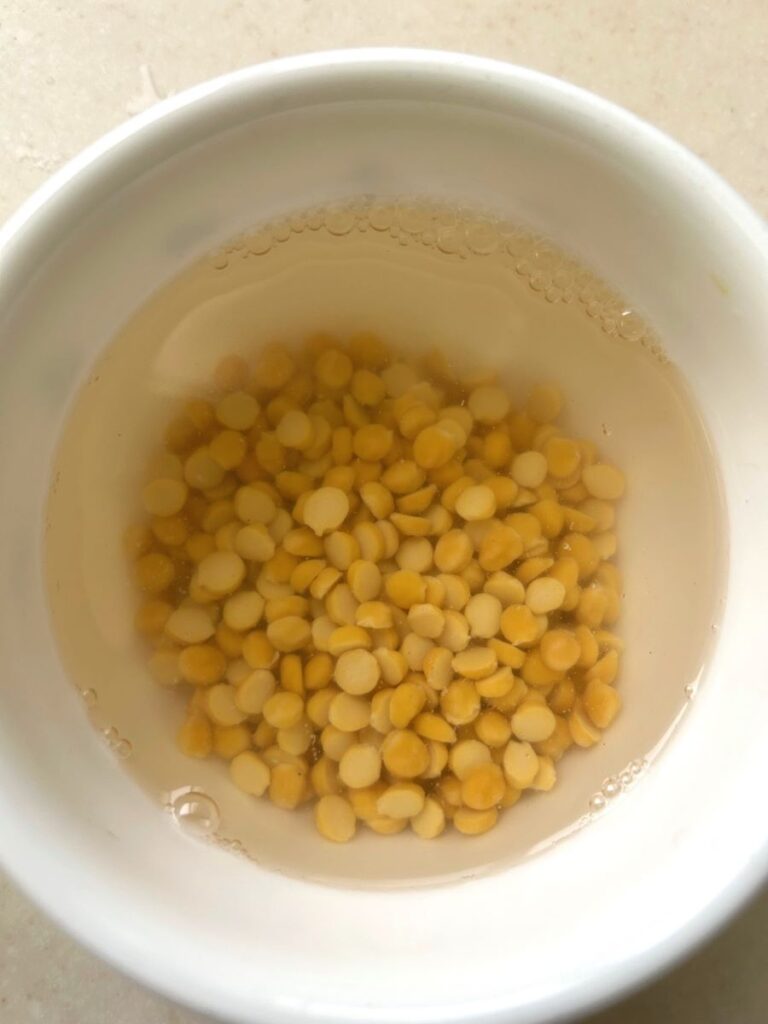
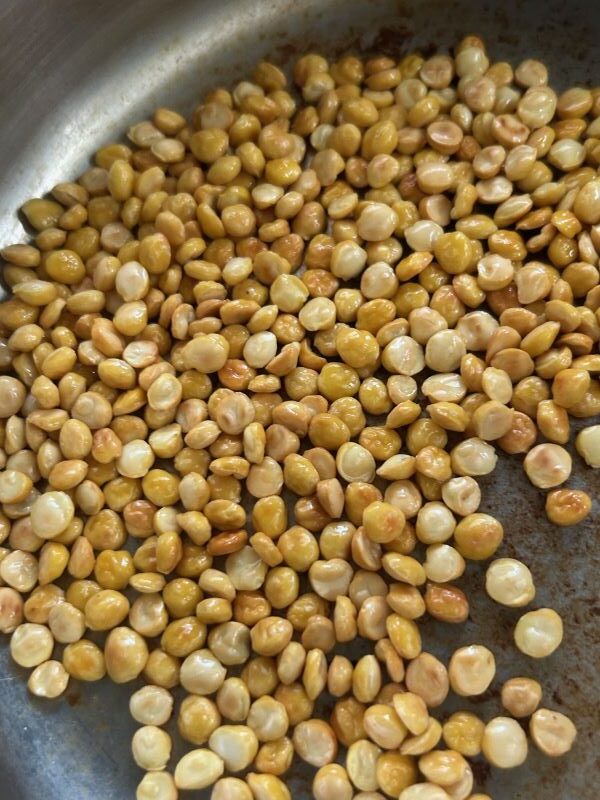
2. Drain water from the dal and pat dry the dal with the kitchen cloth. Heat a tbsp of any neutral unrefined oil in a pan. I used cold pressed groundnut oil. Roast the dal in pan on a medium flame till it becomes golden brown. Do not roast the dal on high flame. It will be brown from the outside but will be raw from inside.
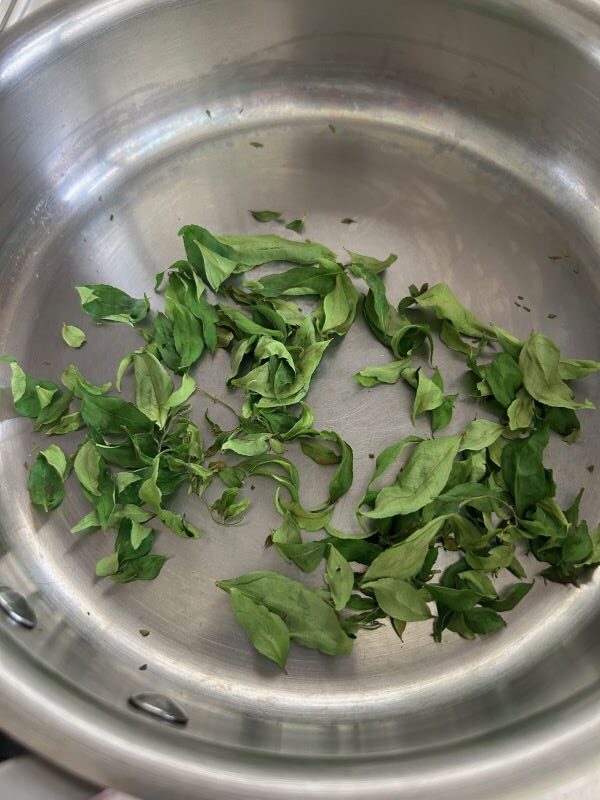
3. Wash 1 cup tightly packed curry leaves. Pat dry with kitchen towel to get rid of excess water. Dry roast curry leaves till the leaves become crisp. Set aside
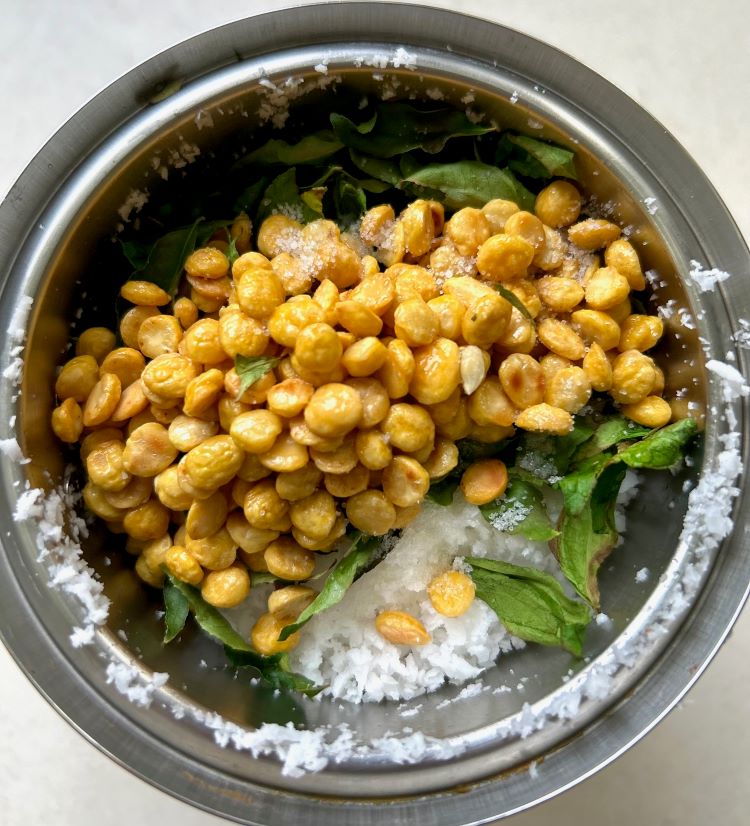
4. Chop 1/2 cup coconut and shred the coconut in a blender. Alternatively you can grate it too but I find the former method much easier.

6. Now in a blender add, 1 green chili (you can skip or remove the seeds to make it less hot), 1 inch ginger, salt to taste, juice from 1/2 a lemon, shredded coconut, roasted channa dal and curry leaves.
Note: Start with adding less salt and lemon juice. You can always add more salt or lemon juice after tasting the chutney.
7. Now add 1/4th cup water grind for few seconds. Remove the lip and scrape from sides. Add 1/4th cup more water and then grind the chutney to a smooth consistency. If required add more water.
Note: Do not add all the water in one go. This may lead to watery chutney. Add little at a time to avoid ending up with runny chutney.
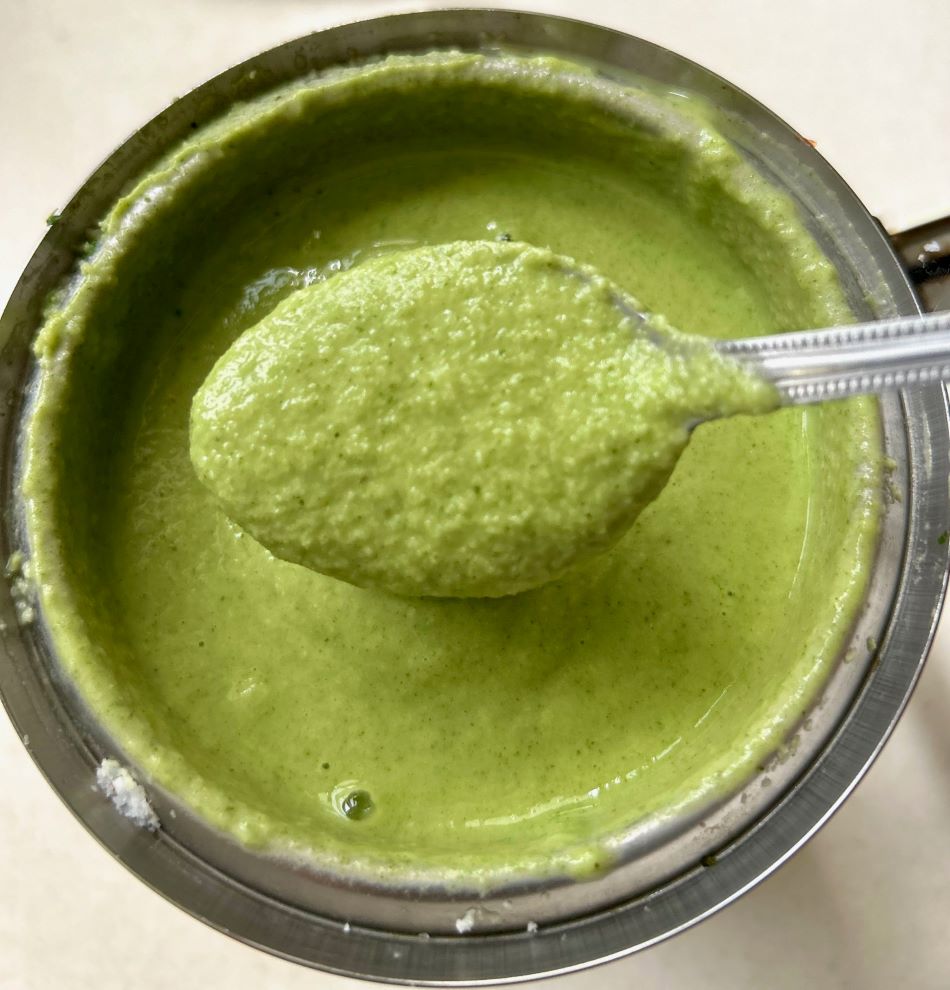
8. Take out the chutney in a steel, glass or ceramic bowl. Avoid plastic bowls.
For Tempering:
9. Heat a tbsp of any neutral oil in a small pan. Add a tsp of mustard seeds. Allow it to splutter. At this point if you prefer, then you can also add a generous pinch of urad dal and fry till dal becomes golden brown. I avoid it because my son prefers a smooth chutney and doesn’t like the bite that comes from dal.
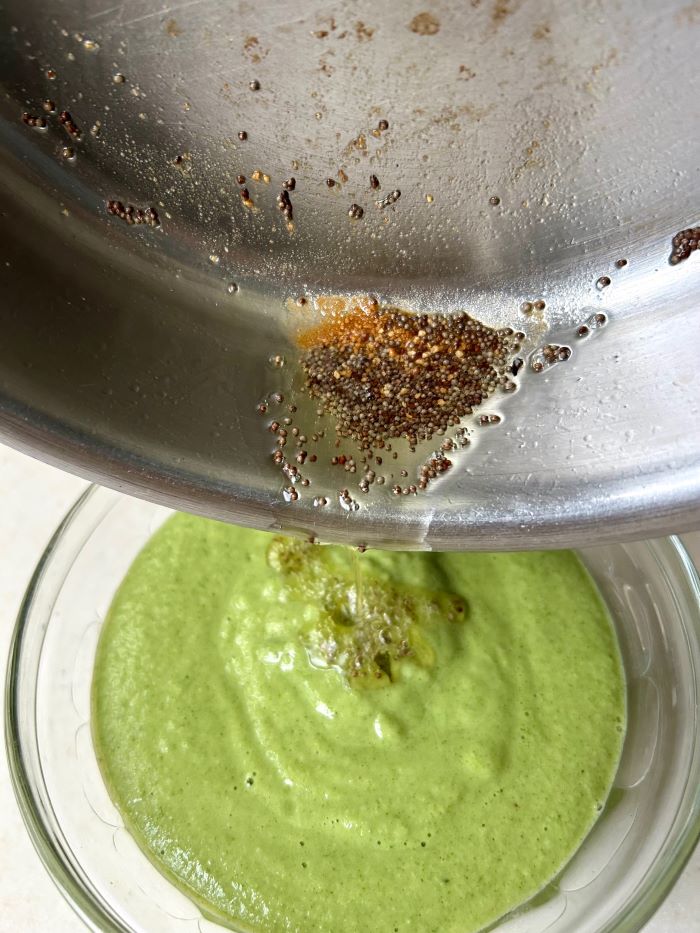
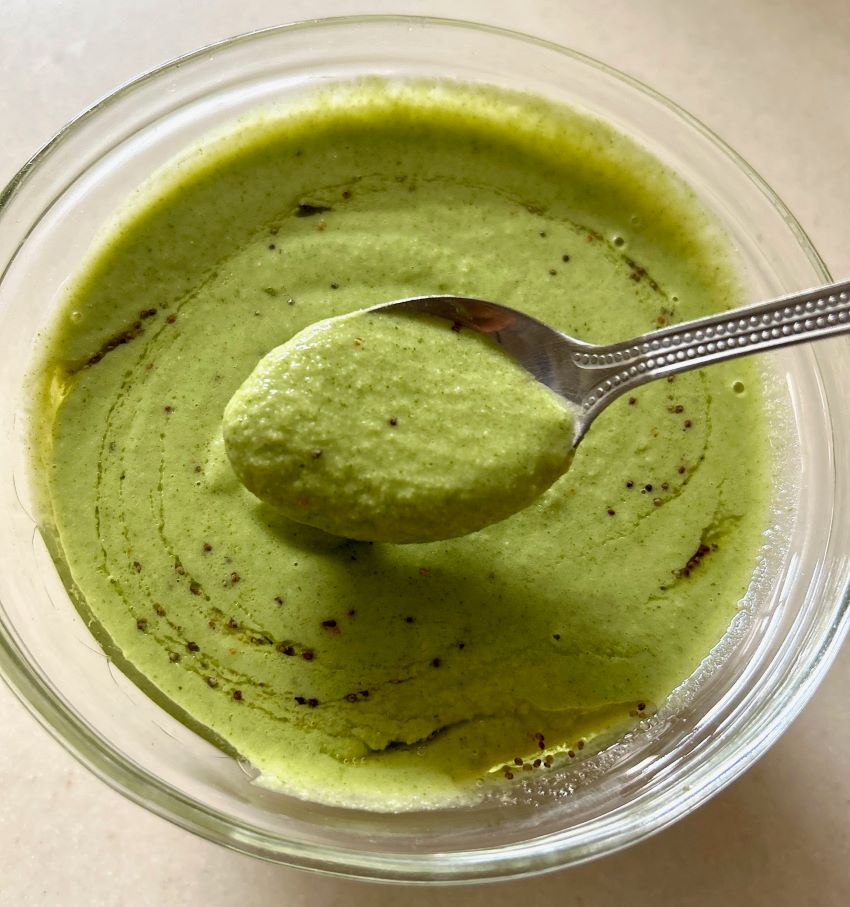
10. Now add a pinch of asafoetida/hing. Allow the hing to cook for couple of seconds then add the tempering on the chutney. Mix well.
Note: For people who are gluten intolerant, do check the asafoetida label. Most commercial brands use wheat flour to process asafoetida.
Pro Tips
- For people who fear nutrient loss while roasting curry leaves, you can dry the curry leaves in shade for a few days till they become crisp. Crush them to make a powder and store in an airtight glass jar. Add to the chutney whenever required.
- Do not dry curry leaves in monsoon as it might get moldy due to humidity.
- You can also fry garlic along with channa dal and add in the chutney. Ginger and garlic both impart great flavours.
- For smooth creamier chutney, make sure to scrape the brown skin of coconut.
Storing and Serving Suggestions
You can store the chutney in refrigerator for 3-4 days. It will thicken a little after refrigeration. You can add few tbsps of warm water to loosen it.
I usually serve this chutney with idlis, dosa, paniyaram (appe) or pakoras. You can serve this chutney with Ragi Paniyaram/Appe, Karnataka Style Spongy Coconut Dosa, Ragi Idli.
You can also use it as a spread on rolls, wraps or sandwiches instead of using any store bought spread or ketchup.
For more interesting easy to make chutney recipes from here Chutney and Spreads.

Curry Leaves Chutney Recipe
Equipment
- 1 Mixer Grinder
Ingredients
For Grinding
- 1 cup Curry Leaves Tightly packed
- 1/2 cup Roasted Channa Dal/Bengal Gram
- 1/2 cup Fresh Coconut Grated or Shredded
- 1 inch Ginger
- 1 small Green Chili
- 1 tbsp Lemon juice
- Salt to taste
- 1 tbsp Any Unrefined Neutral Oil
- 1/2 cup Water
For Tempering
- 1 tsp Mustard seeds
- 1 tbsp Any Unrefined Neutral Oil
- 1 pinch Asafoetida/Hing
Instructions
For Grinding
- Wash and soak channa dal for 1 or 2 hours. Drain the water and pat dry the dal with a clean kitchen towel.
- Heat oil in a pan on a medium heat. Add the dal and roast on medium flame till the dal become golden brown. This will take roughly 8-10 minutes. Set aside.
- Wash curry leaves well. Pat dry them with a kitchen towel.
- In the same pan in which you roasted dal, add curry leaves and roast till the leaves become crisp. Set aside.
- Peel the brown skin of coconut and chop it roughly into small cubes. Now add them in a blender and shred it. It takes roughly 10 seconds. I prefer doing this than grating it.
- In a mixer grinder, add ginger, green chili, lemon juice, roasted dal, curry leaves, salt and coconut.
- Now add 1/4th cup water and grind the chutney for few seconds. Open the blender and scrape of the sides. Now add remaining water and grind again till the chutney reaches a smooth consistency. If you feel the chutney is thick add more water but little at a time.
- Take out the chutney in steel, glass or a ceramic bowl. Avoid plastic bowls.
For Tempering
- In a small pan or tadka pan, heat oil to a medium heat. Add mustard seeds and allow it to splutter.
- Now add hing and cook for couple of seconds. Remove the tempering off heat and pour it over the chutney.
- Serve coconut chutney with idli, dosa, paniyaram, vada or rice of your choice.
Notes
- You can easily make this chutney watery because in the beginning it will feel that you will need more water for blending but add little water at a time while blending.
- Use fresh coconut, that’s shell is pale in color than the dark brown colour or dried coconut. Fresh coconut’s chutney tastes the best while the other might taste a little oily.
- Do temper the chutney. It not only enhances the taste but also increases its shelf life.
- If making for kids, you can skip green chili or remove the seeds before adding it.
Go ahead and give this recipe a shot—it’s super simple and packed with flavour! And once you’ve tried it, don’t forget to drop a comment below. I’d love to know what you thought, how it turned out, or if you added your own twist. Let’s chat in the comments! 😄🌿💬